Landscape Installation

Landscape Installation
Spring or Fall is the best time to plant in many parts of North America. The days are typically cooler and spring often brings the additional benefit of precipitation which means that the landscape requires less supplemental irrigation. Most plants can be planted any time that the ground is not frozen however there are some exceptions. Spring-flowering bulbs should be planted in the fall and ornamental grasses and some of the heat-loving, water-wise perennials generally do better when planted in the spring. When in doubt, check with your local county extension agent or a reputable nursery.
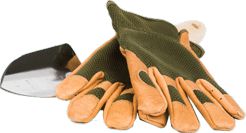
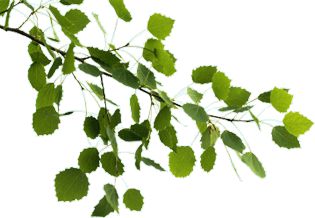
Trees, Shrubs and Large Plants
Installing large trees may require the use of heavy equipment that can compact soil and damage other landscape. When possible, plant large trees and shrubs before installing the rest of the landscape, especially if you plan to install the landscape in stages; trees and shrubs often take many years to mature and their presence provides a visual anchor to the landscape.
Planting holes for trees and shrubs should be about an inch shallower than the depth of the root ball and two to three times as wide. A hole that is deeper than the root ball may result in soil settling and poor drainage.
The soil from each hole should be well-mixed and consist of two parts soil amended with one part compost. Soil that is heavy clay, very sandy, or rocky may need to be replaced with a mixture of topsoil and compost or peat. Dig a shallow trench around the tree or shrub several feet from the base. This will capture precipitation and direct it towards the roots. Most large plants have had their roots pruned to make them easier to transport but this has the effect of removing their base of support. Prior to planting make sure that the root ball and planting hole are well watered.
Cut plastic, wire or other container material from the plant after it has been placed in the hole. These materials provide stability to the soil around the root ball but if left in place can strangle the roots and damage the trunk of the plant. Once the plant has been lowered into the ground, walk around the plant at intervals during the planting process to make sure that it is straight. Add or subtract soil around the root ball to make adjustments.
Fill in the planting hole with the amended soil and water thoroughly. Watering helps to eliminate air pockets around the root zone. Avoid walking on wet soil to avoid compaction. In recent years horticulturalists have begun to discourage the practice of staking newly planted trees and shrubs which have been shown to develop better root systems and stronger trunks if allowed to move freely in the wind. However, if prevailing winds are very strong, trees may benefit from staking for the first year. Place two stakes several feet from the trunk of the tree and buried sufficiently deep enough to prevent being pulled out. Place stakes perpendicular to the direction of the prevailing wind. Insert wire or nylon twine through a length of old inner tube or garden hose and attach the wire to the stakes. Never use wire or nylon directly on the tree – these materials can abrade the bark and cause permanent damage to the trunk.
Turf and Grasses
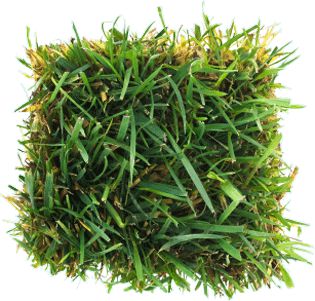
Turf areas are often the most water intensive in the landscape. Good site preparation and installation is essential to keeping turf areas as water wise as possible. Turf can be installed as seed, plugs, or sod depending on the variety.
If you are using an automatic irrigation system to water your turf the irrigation system should be installed prior to planting. Each zone should be operated and any problems with the system should be repaired.
When using sod, the planting area should be thoroughly prepared before having the sod delivered; this will reduce the root damage that can occur from drying out. Sod rolls should be laid out end to end along the long side of the planting area and care should be taken not tear the sod or to leave gaps between rolls. Sod should be watered immediately after installation and will require frequent irrigation until the roots are established. This can be tested by gently pulling up on the turf which will not lift up once it is rooted.
Water-Wise Plants
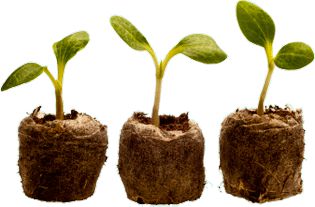
Installing water-wise plants is straight forward and should not require special planting techniques if the soil has been well-prepared and you have selected plants that are compatible with the site characteristics. In areas where landscape fabric is being used it should be installed prior to planting and can be held in place with landscape pins. Drip irrigation should be laid on top of the fabric which makes it more accessible for repairs.
Before planting, follow the landscape design plan to lay plants out and measure the spaces between plants. When planting small plants in large spaces estimating distances between plants can result in expensive errors as plants mature.
Dig a hole of sufficient size to spread the roots out and take care not to damage roots. Nursery plants that grow vigorously may have roots wrapped around the inside of the container. Remove the plant carefully by loosening the soil around the edge of the pot or cut the container away from the plant. Pulling the plant out of the container can damage the delicate root structure or stem of the plant. Backfill planting holes with the soil that was removed and water well. Where drip irrigation is being used emitter(s) should be placed around the root zone of each plant.
Mulch
Applying mulch is usually the last step of landscape installation and serves several purposes. Its primary purpose is to keep the soil surface cool and evenly moist which reduces the amount of irrigation necessary. A layer of mulch several inches deep reduces evaporative losses from wind, reduces weeds by preventing weed seeds from reaching the soil surface, and discourages germination of weed seeds on the soil surface. Mulches provide an attractive ground cover that defines the planting areas in the landscape. They are generally classified into one of two categories: organic or inorganic.
Examples of organic mulches are:
- bark chunks (several different sizes are available)
- pine needles
- shredded bark
- wood chips
- grass clipping
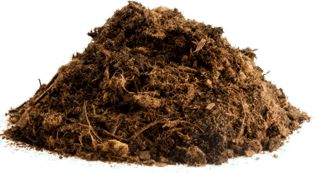
- compost
- nut shells
- leaves
Organic mulches can help to replace nutrients in the soil as they decompose although materials such as grass clippings and wood may cause nitrogen depletion as they degrade. Large bark chunks and other lightweight mulches tend to blow away especially in windy areas. All organic mulches will need to be replaced periodically; some yearly, others less frequently.
Examples of inorganic mulch are:
- rock, gravel or crushed stone
- landscape fabric
- plastic
Inorganic mulches decompose slowly, if at all, and rarely need to be replaced. Rock mulches are more expensive than organic mulches and because of their weight are much more labor intensive to distribute. Many water-wise plants prefer rock mulches because they are less likely to hold water at the base of the plant. Landscape fabric and plastic are good weed barriers and very effective for moisture retention. They must, however, be installed before planting and are unattractive unless covered with some other type of mulch.
Maintenance
Landscapes are never truly finished – there will always some maintenance required. For those who love gardening there will always be the lure of another plant to tuck into an empty corner or to replace a plant that, despite your best efforts, is not thriving. For now, though you can have the satisfaction that you did your best to create a beautiful landscape that thrives and is water-wise. So sit back and enjoy!